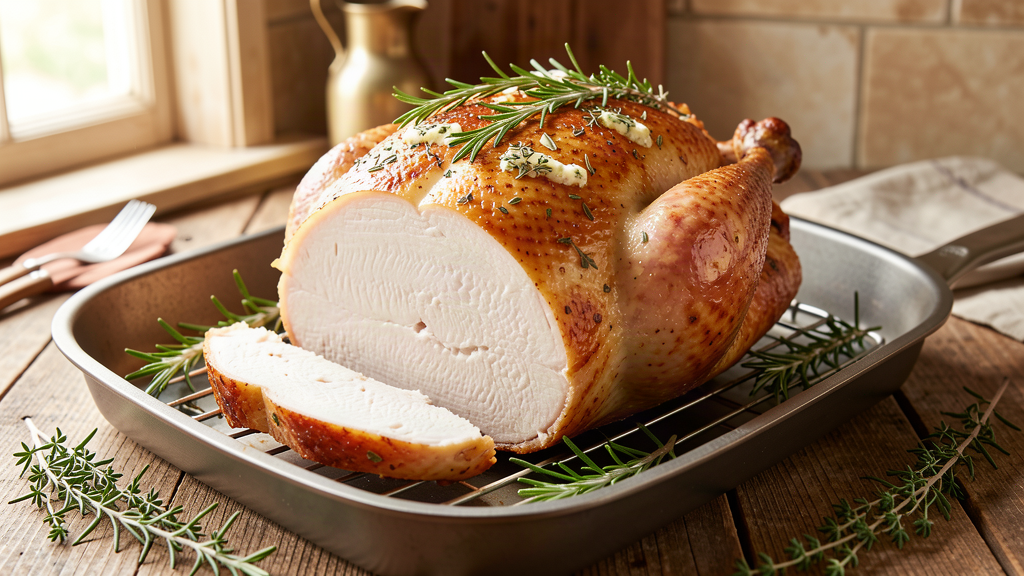
A manageable garlic-and-herb turkey breast for a smaller Christmas or New Year table. The clear method and dual US–metric measurements make it approachable for a Christmas or New Year gathering.
Heat the oven to 350°F (175°C). Set the turkey breast on a rack in a roasting pan.
Mix butter, garlic, rosemary, thyme, salt, and pepper. Pat turkey dry and rub the mixture over and under the skin where possible.
Pour broth into the pan. Roast for 75 to 95 minutes, tenting loosely if the skin browns too fast.
Check the thickest part in several places without touching bone. Remove when it reaches 165°F (74°C). Rest for 20 minutes before carving.
Notes
A boneless turkey breast cooks faster; verify temperature early. Olive oil can replace butter.Use a thermometer rather than color or time alone, and sanitize every surface that touched raw poultry.Refrigerate carved turkey within 2 hours for up to 4 days. Reheat leftovers to 165°F (74°C).
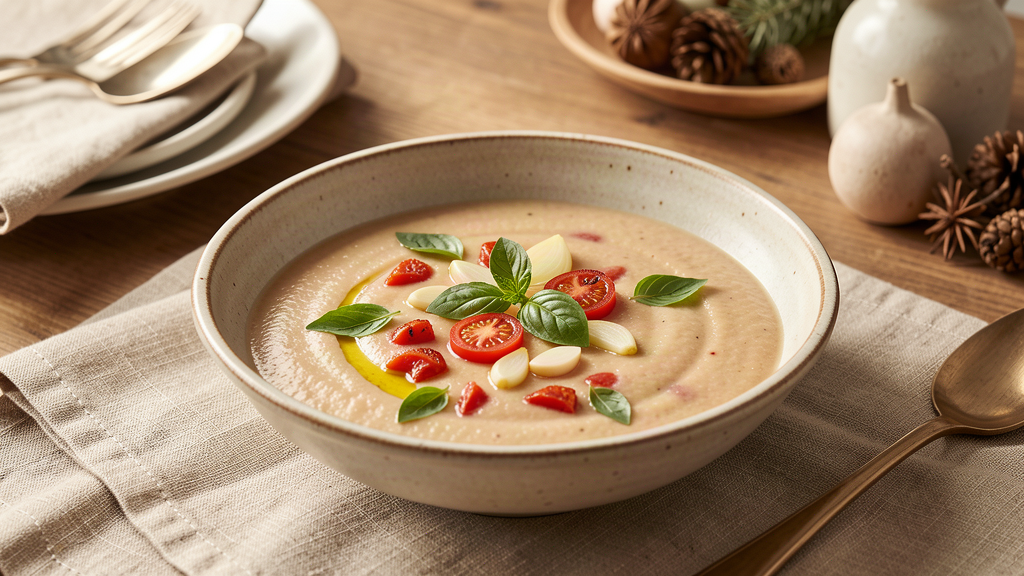
Oven-roasted tomatoes, garlic, and basil make a smooth, deeply flavored soup from simple ingredients. The clear method and dual US–metric measurements make it approachable for a practical lunch or dinner.
Heat the oven to 425°F (220°C). Spread tomatoes, onion, and garlic on a rimmed sheet pan. Toss with olive oil, salt, and pepper.
Roast for 30 minutes, until the tomatoes collapse and their edges brown.
Transfer the vegetables and juices to a pot. Add the broth, bring to a simmer, and cook for 8 minutes.
Blend until smooth with an immersion blender. Stir in basil and optional cream, then warm gently for 2 minutes without boiling.
Notes
Use canned whole tomatoes when fresh tomatoes are not flavorful; drain them first. Omit the cream or use unsweetened oat cream for a vegan soup.Blend carefully: keep an immersion blender submerged, or vent a countertop blender and work in small batches.Cool promptly and refrigerate for up to 4 days, or freeze without cream for up to 3 months. Reheat to a simmer.
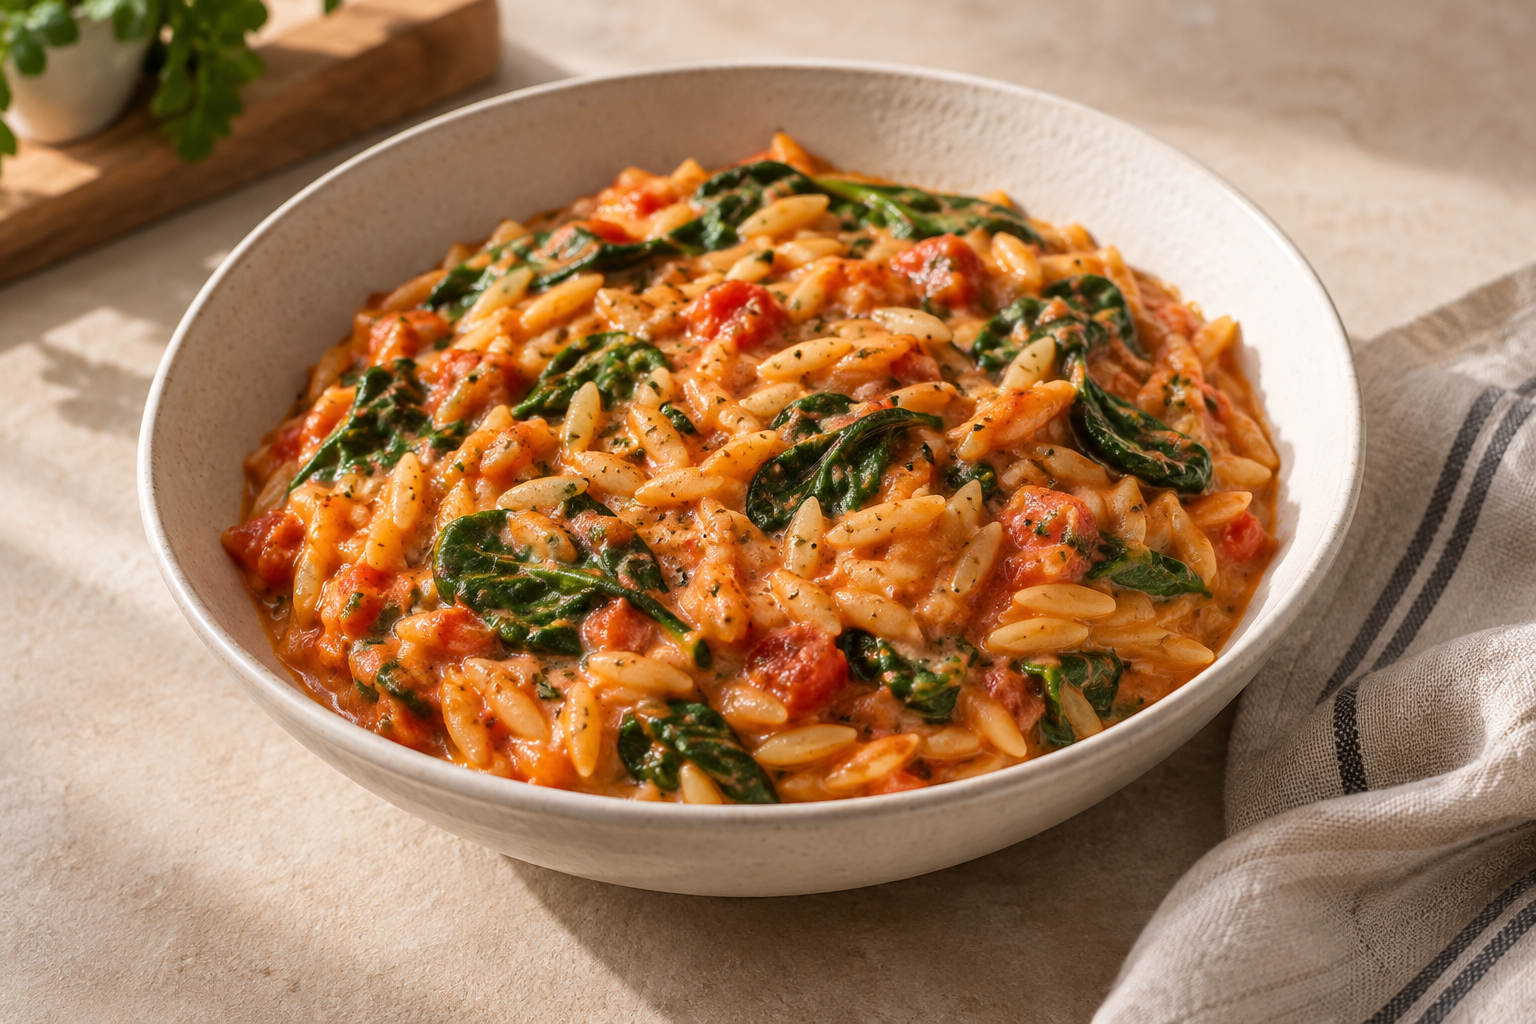
A creamy one-pan pasta with pantry tomatoes and fresh spinach, ready in 30 minutes. It uses familiar ingredients and straightforward steps, making it practical for a busy weeknight without sacrificing flavor.
Weeknight-friendly. The full recipe takes about 30 minutes from start to finish.
Practical ingredients. Everything is easy to find in a regular grocery store.
Clear instructions. Each step is written for dependable home cooking.
Flexible. The substitutions below help you work with what you already have.
What you need
1 tbsp (15 ml) olive oil
1 small yellow onion, diced
3 garlic cloves, minced
1 cup (200 g) dry orzo
1 can (14.5 oz / 411 g) crushed tomatoes
2 cups (480 ml) low-sodium vegetable broth
1/2 tsp dried oregano
1/2 tsp fine salt
1/4 tsp black pepper
3 cups (90 g) baby spinach
1/3 cup (35 g) finely grated Parmesan, optional
How to make creamy tomato orzo with spinach
Heat the olive oil in a large deep skillet over medium heat. Cook the onion for 3 to 4 minutes, until softened.
Add the garlic and orzo. Stir for 1 minute so the pasta is lightly coated and fragrant.
Add the tomatoes, broth, oregano, salt, and pepper. Bring to a gentle simmer.
Cook uncovered for 10 to 12 minutes, stirring often, until the orzo is tender and the sauce is creamy. Add a splash of water if it becomes dry before the pasta is done.
Fold in the spinach until wilted. Remove from the heat and stir in Parmesan, if using. Rest for 2 minutes before serving.
Substitutions
Use dairy-free Parmesan or omit it for a vegan version. Frozen spinach works after thawing and squeezing it dry.
Practical tip
Stir frequently near the end because orzo can stick as the liquid reduces.
Storage and reheating
Refrigerate for up to 4 days. Reheat gently with a spoonful of water or broth.
Serving ideas
Serve this recipe with a simple green salad, steamed vegetables, or crusty bread when appropriate. Choose one side that complements the meal rather than adding unnecessary work.
Recipe card
Creamy Tomato Orzo with Spinach
A creamy one-pan pasta with pantry tomatoes and fresh spinach, ready in 30 minutes.
Heat the olive oil in a large deep skillet over medium heat. Cook the onion for 3 to 4 minutes, until softened.
Add the garlic and orzo. Stir for 1 minute so the pasta is lightly coated and fragrant.
Add the tomatoes, broth, oregano, salt, and pepper. Bring to a gentle simmer.
Cook uncovered for 10 to 12 minutes, stirring often, until the orzo is tender and the sauce is creamy. Add a splash of water if it becomes dry before the pasta is done.
Fold in the spinach until wilted. Remove from the heat and stir in Parmesan, if using. Rest for 2 minutes before serving.
Notes
Use dairy-free Parmesan or omit it for a vegan version. Frozen spinach works after thawing and squeezing it dry.Stir frequently near the end because orzo can stick as the liquid reduces.Refrigerate for up to 4 days. Reheat gently with a spoonful of water or broth.
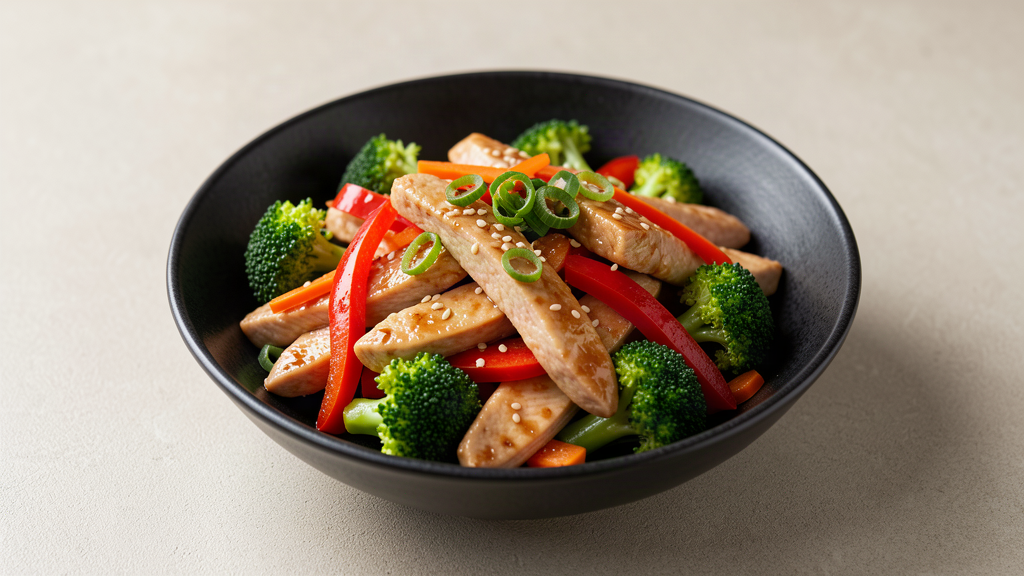
This 25-minute chicken and vegetable stir-fry combines tender chicken thighs, crisp vegetables, and a light soy-ginger sauce in one hot skillet. Prepare every ingredient first, because the cooking moves quickly once the oil is hot.
3 tablespoons (45 ml) low-sodium soy sauce, for the chicken
1 tablespoon (8 g) cornstarch, for the chicken
2 tablespoons (30 ml) vegetable oil
2 cups (200 g) broccoli florets
1 medium red bell pepper (about 150 g), sliced
1 medium carrot (about 100 g), thinly sliced
3 garlic cloves, minced
1 tablespoon (15 g) fresh ginger, minced
1 tablespoon (15 ml) toasted sesame oil
2 tablespoons (30 ml) low-sodium soy sauce, for the sauce
1 tablespoon (20 g) honey
1 tablespoon (15 ml) rice vinegar
1 teaspoon cornstarch, for the sauce
2 tablespoons (30 ml) water
4 cups (about 800 g) cooked white rice, optional for serving
1 teaspoon sesame seeds, optional
2 tablespoons sliced green onions, optional
1/2 teaspoon crushed red pepper, optional for heat
Substitutions
Ingredient
Substitute
What changes
Chicken thighs
Chicken breast
Slice thinly, check early, and cook to 165°F (74°C); it dries more easily.
Broccoli
Snow peas or green beans
Use the same weight; green beans may need an extra minute.
Soy sauce
Tamari
Use the same amount; check the label if gluten-free preparation matters.
Cornstarch
Arrowroot starch
Use the same amount and avoid prolonged boiling.
Step-by-step instructions
Toss the sliced chicken with 3 tablespoons (45 ml) soy sauce and 1 tablespoon (8 g) cornstarch. Let it stand for 5 minutes while you finish the vegetables and sauce.
Whisk 2 tablespoons (30 ml) soy sauce, honey, rice vinegar, 1 teaspoon cornstarch, and water until smooth.
Heat a large wok or skillet over high heat. Add the vegetable oil and swirl to coat.
Spread the chicken in one layer. Leave it undisturbed for 1 minute, then stir-fry for 3–4 minutes. Check several thick pieces and continue until the chicken reaches at least 165°F (74°C). Transfer to a clean plate.
Add the broccoli, bell pepper, and carrot. Stir-fry for 2–3 minutes. Add the garlic, ginger, sesame oil, and optional crushed red pepper; cook for 30 seconds.
Return the chicken and juices to the pan. Whisk the sauce again, pour it in, and toss for 1–2 minutes until it lightly coats everything.
Serve immediately with rice if desired, plus sesame seeds and green onions if using.
Practical tips
Cut the vegetables first. Then cut the chicken on a separate cutting board, or thoroughly wash and sanitize the board and knife before using them for vegetables or other ready-to-eat ingredients.
Use a large pan so ingredients sear instead of steam.
Whisk the sauce again immediately before adding it.
Use a clean plate for cooked chicken.
Storage and reheating
Cool leftovers promptly and refrigerate in an airtight container for up to 3 days. Reheat until the chicken reaches 165°F (74°C). Store rice separately when possible and refrigerate it promptly. Freezing is not recommended because the vegetables lose crispness.
Frequently asked questions
Can I use frozen vegetables?
Yes. Use about 3 cups (400 g) frozen stir-fry vegetables. Cook from frozen for an extra 1–2 minutes and remove excess liquid if needed.
Why did the sauce stay thin?
The cornstarch may have settled. Whisk immediately before adding the sauce and let it bubble briefly.
Can I make it spicy?
Add the optional 1/2 teaspoon crushed red pepper with the garlic and ginger.
25-Minute Chicken and Vegetable Stir-Fry
Thin chicken strips, broccoli, red bell pepper, and carrots finished in a light soy-ginger sauce.
1lb450 g boneless, skinless chicken thighs, cut into thin strips
3tablespoons45 ml low-sodium soy sauce, for the chicken
1tablespoon8 g cornstarch, for the chicken
2tablespoons30 ml vegetable oil
2cups200 g broccoli florets
1medium red bell pepperabout 150 g, sliced
1medium carrotabout 100 g, thinly sliced
3garlic clovesminced
1tablespoon15 g fresh ginger, minced
1tablespoon15 ml toasted sesame oil
2tablespoons30 ml low-sodium soy sauce, for the sauce
1tablespoon20 g honey
1tablespoon15 ml rice vinegar
1teaspooncornstarchfor the sauce
2tablespoons30 ml water
4cupsabout 800 g cooked white rice, optional for serving
1teaspoonsesame seedsoptional
2tablespoonssliced green onionsoptional
1/2teaspooncrushed red pepperoptional for heat
Method
Toss the sliced chicken with 3 tablespoons (45 ml) soy sauce and 1 tablespoon (8 g) cornstarch. Let it stand for 5 minutes while you finish the vegetables and sauce.
Whisk 2 tablespoons (30 ml) soy sauce, honey, rice vinegar, 1 teaspoon cornstarch, and water until smooth.
Heat a large wok or skillet over high heat. Add the vegetable oil and swirl to coat.
Spread the chicken in one layer. Leave it undisturbed for 1 minute, then stir-fry for 3–4 minutes. Check several thick pieces and continue until the chicken reaches at least 165°F (74°C). Transfer to a clean plate.
Add the broccoli, bell pepper, and carrot. Stir-fry for 2–3 minutes. Add the garlic, ginger, sesame oil, and optional crushed red pepper; cook for 30 seconds.
Return the chicken and juices to the pan. Whisk the sauce again, pour it in, and toss for 1–2 minutes until it lightly coats everything.
Serve immediately with rice if desired, plus sesame seeds and green onions if using.
Notes
Cook the chicken to at least 165°F (74°C), use a clean plate after cooking, and prepare all ingredients before heating the pan.Cut the vegetables first. Then cut the chicken on a separate cutting board, or thoroughly wash and sanitize the board and knife before using them for vegetables or other ready-to-eat ingredients.
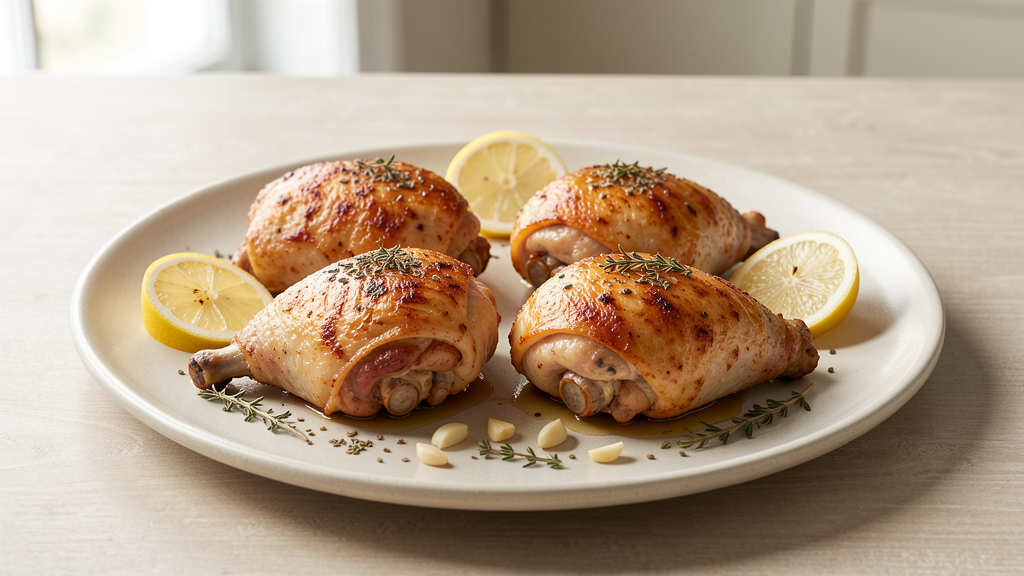
Baked lemon herb chicken thighs are a practical oven dinner with crisp skin, juicy meat, and bright garlic-lemon flavor. The chicken roasts on one pan, and a thermometer takes the guesswork out of doneness.
If you would rather make a hearty one-pot meal, this one-pot chili mac and cheese is another practical dinner option.
Begin checking after 20 minutes and cook to 165°F (74°C); there will be no crisp skin.
Chicken thighs
Drumsticks
Begin checking at 35 minutes and continue until 165°F (74°C).
Oregano
Italian seasoning
Use the same amount; the flavor includes additional herbs.
Fresh garlic
1 teaspoon garlic powder
Mix it with the oil and dried herbs.
Step-by-step instructions
Preheat. Heat the oven to 425°F (220°C).
Dry the chicken. Pat thoroughly dry and arrange skin-side up with space between pieces.
Make the seasoning. Zest the lemon, halve it, and combine the zest, olive oil, garlic, oregano, thyme, salt, and pepper. Keep the juice from one lemon half separate.
Season. Rub the oil and herb mixture over the tops and sides of the thighs. Slice the remaining lemon half and arrange the slices around the chicken, not on the skin. Pour the reserved lemon juice into the pan around the chicken, keeping the skin as dry as possible.
Roast. Bake about 35 minutes. Check each thigh and continue until every piece reaches at least 165°F (74°C) without the thermometer touching bone.
Rest. Rest for 5 minutes.
Serve. Spoon a little pan juice around the chicken and add lemon wedges if desired.
Practical tips
Dry skin browns more effectively than damp skin.
Pour the lemon juice around the chicken instead of over the skin so the skin can brown and crisp properly.
Keep lemon slices beside the thighs rather than covering the skin.
Do not rely on color alone; check each piece with a thermometer.
Smaller thighs may finish first.
Storage and reheating
Cool leftovers promptly and refrigerate in an airtight container for up to 4 days. Reheat in a 350°F (175°C) oven until the center reaches 165°F (74°C). Freeze for up to 3 months, thaw overnight in the refrigerator, and reheat thoroughly.
Frequently asked questions
Where should I insert the thermometer?
Insert it into the thickest part of the meat without touching bone. Check each thigh separately.
Why did the skin stay soft?
The chicken may have been damp or crowded. Pat it dry, leave space between pieces, and keep lemon slices off the skin.
Can I use boneless thighs?
Yes. Begin checking after 20 minutes and cook until the thickest part reaches at least 165°F (74°C).
Baked Lemon Herb Chicken Thighs
Bone-in chicken thighs roasted with lemon, garlic, oregano, and thyme until golden and safely cooked through.
4bone-inskin-on chicken thighs (about 2 lb / 900 g total)
2tablespoons30 ml olive oil
1medium lemon
4garlic clovesminced
1teaspoondried oregano
1teaspoondried thyme
1teaspoonsalt
1/2teaspoonblack pepper
Lemon wedgesoptional for serving
Method
Heat the oven to 425°F (220°C). Line a rimmed sheet pan with parchment or foil if desired.
Pat the thighs thoroughly dry with paper towels and place them skin-side up with space between each piece.
Zest the lemon, halve it, and combine the zest, olive oil, garlic, oregano, thyme, salt, and pepper. Keep the juice from one lemon half separate.
Rub the oil and herb mixture over the tops and sides of the thighs. Slice the remaining lemon half and arrange the slices around the chicken, not on the skin. Pour the reserved lemon juice into the pan around the chicken, keeping the skin as dry as possible.
Roast for about 35 minutes. Check the thickest part of each thigh without touching bone. Continue roasting as needed until every piece reaches at least 165°F (74°C) and the skin is golden.
Rest the chicken for 5 minutes.
Spoon a little pan juice around the chicken and serve with fresh lemon wedges if desired.
Notes
Roast until every thigh reaches at least 165°F (74°C) in the thickest part without touching bone. The 40-minute cook time includes a 5-minute rest.Pour the lemon juice around the chicken instead of over the skin so the skin can brown and crisp properly.
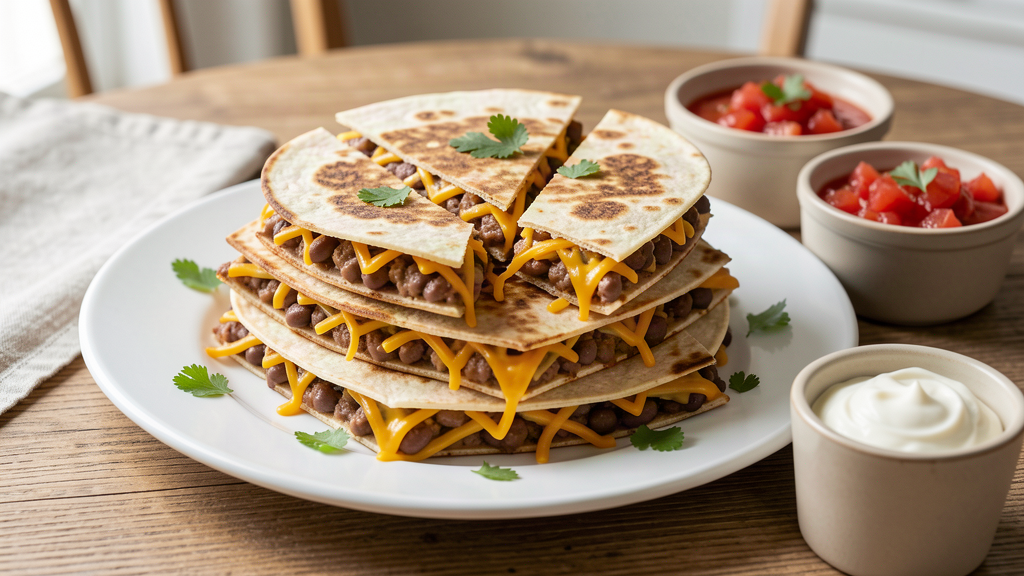
These 15-minute bean and cheese quesadillas turn pantry staples into a hot, crisp dinner. Seasoned pinto beans and melted cheese make a filling that stays in place, while a large griddle lets you cook two quesadillas at a time.
Equipment: A large griddle that fits two 8-inch quesadillas at once, a mixing bowl, fork, spatula, and knife.
Ingredients
1 can (15 oz / 425 g) pinto beans, drained and rinsed (about 1 1/2 cups / 250 g drained)
1 1/2 cups (150 g) shredded Mexican cheese blend
1/2 teaspoon ground cumin
1/2 teaspoon mild chili powder
1/4 teaspoon salt
8 flour tortillas (8-inch / 20 cm)
1 tablespoon (15 ml) olive oil, divided, or cooking spray
1/2 cup (120 ml) salsa, optional
1/4 cup (60 g) sour cream, optional
2 tablespoons chopped fresh cilantro, optional
Substitutions
Ingredient
Substitute
What changes
Pinto beans
Black beans or cannellini beans
Use the same drained amount; flavor and color will change.
Mexican cheese blend
Cheddar, Monterey Jack, or Colby
Use the same weight; melting and flavor vary slightly.
Flour tortillas
Corn tortillas
Use 8 small corn tortillas to make 8 folded half-moon quesadillas. Divide the filling evenly among them and serve 2 per person. Cook in additional batches; total time will be about 25 minutes.
Sour cream
Plain Greek yogurt
The topping will taste tangier.
Step-by-step instructions
Prepare the filling. Put the drained beans in a bowl. Mash about two-thirds with a fork, leaving some whole. Stir in the cumin, chili powder, and salt.
Assemble. Lay out four tortillas. Divide the beans among them, stopping 1/2 inch (1 cm) from the edges. Top each with 3/8 cup (about 38 g) cheese, cover with the remaining tortillas, and press gently.
Heat the griddle. Heat over medium and brush with half the oil or coat lightly with cooking spray.
Cook the first batch. Cook two quesadillas for about 2 minutes per side, pressing gently, until golden and the cheese melts.
Cook the second batch. Transfer the first batch to a board. Add the remaining oil if needed, then cook the other two for about 2 minutes per side.
Rest and serve. Rest for 30 seconds, cut into wedges, and serve with salsa, sour cream, and cilantro if using.
Practical tips
Drain the beans well so the tortillas stay crisp.
Use medium heat so the cheese melts before the tortillas become too dark.
Keep the filling slightly away from the edges to limit spillover.
The 15-minute timing assumes drained and rinsed beans, pre-shredded cheese, and a large griddle that fits two quesadillas at once.
Storage and reheating
Cool leftovers promptly and refrigerate them in an airtight container for up to 3 days. Reheat in a dry skillet or on a griddle over medium-low heat until hot and crisp. Freeze cooled quesadillas between sheets of parchment for up to 1 month and reheat from frozen over medium-low heat.
Frequently asked questions
Why did the tortilla brown before the cheese melted?
The griddle was probably too hot. Use medium heat and allow about 2 minutes per side.
Can I assemble these ahead?
Yes. Assemble them up to 24 hours ahead, separate with parchment, cover, and refrigerate. Cook just before serving.
Can I use a regular skillet?
Yes, but cooking one quesadilla at a time requires more batches and takes longer than 15 minutes.
15-Minute Bean and Cheese Quesadillas
Crisp flour-tortilla quesadillas filled with seasoned pinto beans and melted cheese, cooked in two quick griddle batches.
1can15 oz / 425 g pinto beans, drained and rinsed (about 1 1/2 cups / 250 g drained)
1 1/2cups150 g shredded Mexican cheese blend
1/2teaspoonground cumin
1/2teaspoonmild chili powder
1/4teaspoonsalt
8flour tortillas8-inch / 20 cm
1tablespoon15 ml olive oil, divided, or cooking spray
Optional for serving
1/2cup120 ml salsa
1/4cup60 g sour cream
2tablespoonschopped fresh cilantro
Method
Put the drained beans in a bowl. Mash about two-thirds with a fork, leaving some beans whole. Stir in the cumin, chili powder, and salt.
Lay out four tortillas. Divide the bean mixture evenly among them and spread it to within 1/2 inch (1 cm) of the edges. Top each with 3/8 cup (about 38 g) cheese, cover with the remaining tortillas, and press gently.
Heat a large griddle over medium heat. Brush with about half of the oil or coat lightly with cooking spray.
Place two quesadillas on the griddle. Cook for about 2 minutes per side, pressing gently with a spatula, until golden and the cheese is melted.
Transfer the first batch to a board. Add the remaining oil if the griddle looks dry, then cook the remaining two quesadillas for about 2 minutes per side.
Rest for 30 seconds, cut into wedges, and serve with salsa, sour cream, and cilantro if using.
Notes
Drain the beans well and keep the griddle over medium heat. The 15-minute timing assumes drained and rinsed beans, pre-shredded cheese, and a large griddle that fits two quesadillas at once.
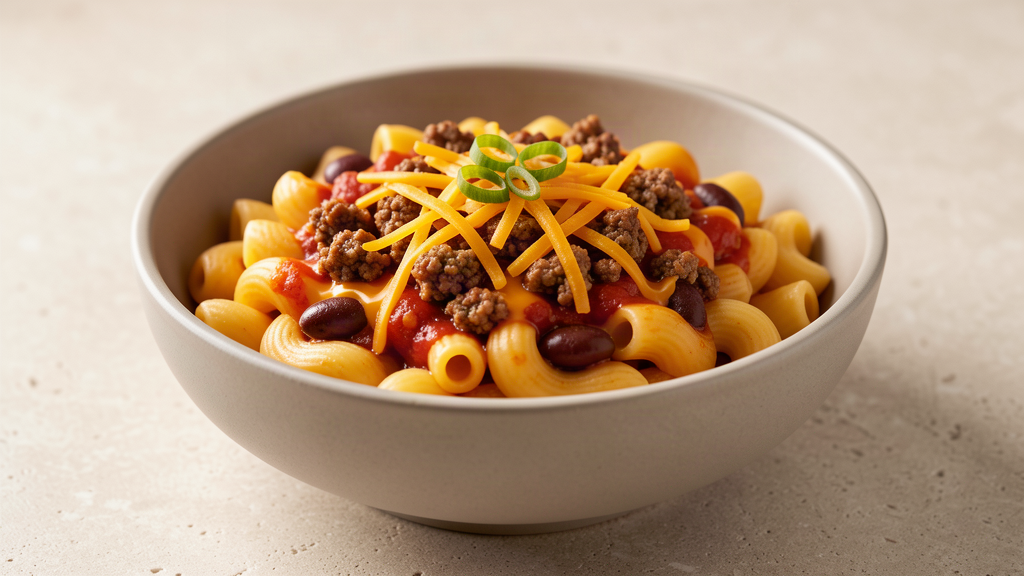
One-pot chili mac and cheese brings together two familiar comfort-food favorites in one practical weeknight dinner. Ground beef, kidney beans, tomatoes, and elbow macaroni simmer in the same pot before cheddar is stirred through for a thick, savory finish.
This recipe takes about 40 minutes, serves five, and uses affordable grocery-store ingredients. Because the pasta cooks directly in the chili mixture, cleanup stays simple and every bite picks up the seasoned tomato sauce.
Equipment: One large pot or Dutch oven with a lid, a wooden spoon, and measuring cups and spoons.
How to make it
Brown the ground beef, then soften the onion and garlic in the same pot. Add the tomatoes, beans, broth, and seasonings before stirring in the macaroni. Once the pasta is tender, remove the pot from the heat and stir in the cheddar. The full ingredient amounts and detailed steps are in the recipe card below.
One-Pot Chili Mac and Cheese
A comforting one-pot dinner with ground beef, elbow macaroni, kidney beans, tomatoes, and melted cheddar, ready in about 40 minutes.
1can15 oz / 425 g kidney beans, drained and rinsed
2cups480 ml beef broth, plus more if needed
1tbsp15 ml chili powder
1tsp5 ml ground cumin
1/2tsp2.5 ml salt
1/4tsp1.25 ml black pepper
8oz225 g uncooked elbow macaroni
1cup100 g shredded cheddar cheese
1/4cup60 ml sour cream, optional, for serving
2tbspsliced green onionsoptional, for serving
Equipment
1 Large pot or Dutch oven with lid
1 Wooden spoon
1 Measuring cups and spoons
Method
Heat the olive oil in a large pot or Dutch oven over medium-high heat. Add the ground beef and cook, breaking it apart with a wooden spoon, for 5–7 minutes, until browned and no longer pink. Confirm it reaches at least 160°F (71°C), then drain excess fat if needed.
Add the diced onion and cook, stirring occasionally, for about 4 minutes, until softened and translucent.
Add the minced garlic and stir for 30 seconds, until fragrant. Do not let it brown.
Add the diced tomatoes with their juices, drained kidney beans, beef broth, chili powder, cumin, salt, and black pepper. Stir well and scrape up any browned bits from the bottom of the pot.
Add the uncooked elbow macaroni and stir to submerge it. Bring the mixture to a boil over medium-high heat.
Reduce the heat to medium-low, cover, and simmer for 12–14 minutes, stirring once halfway through, until the macaroni is tender and most of the liquid has been absorbed. If the pasta is still firm and the liquid is low, add 1/4 cup (60 ml) water and cook for 2–3 minutes more.
Remove the pot from the heat. Add the shredded cheddar and stir until melted and evenly distributed. Let the chili mac stand for 2 minutes so the sauce can thicken.
Divide among bowls. Top with sour cream and sliced green onions if using, and serve hot.
Notes
Use standard blended chili powder, not pure ground chile. Refrigerate leftovers in an airtight container for up to 4 days and reheat thoroughly with a splash of water or broth. Freeze for up to 2 months; thaw overnight in the refrigerator before reheating.
Safe substitutions
Ingredient
Substitute
What changes
Ground beef
Ground turkey or chicken
The flavor is milder; cook the poultry to at least 165°F (74°C).
Ground beef
Plant-based ground alternative
Use the same amount and follow the package cooking directions.
Kidney beans
Pinto beans or black beans
Use the same drained amount; the texture and flavor will vary slightly.
Beef broth
Chicken or vegetable broth
Use the same amount; the finished dish will taste lighter.
Elbow macaroni
Small shells or rotini
Use the same weight and check doneness because cooking time may vary by 1–2 minutes.
Cheddar
Monterey Jack or Colby
Both melt well but give the sauce a milder flavor.
Sour cream
Plain Greek yogurt
Add it only when serving; it tastes slightly tangier.
Storage and reheating
Refrigerate: Cool leftovers promptly and store them in an airtight container for up to 4 days.
Reheat: Warm gently in a pot over low heat with a splash of water or broth, stirring until heated through. For microwave reheating, cover loosely and stir between short intervals.
Freeze: Freeze individual portions for up to 2 months. Thaw overnight in the refrigerator before reheating. The pasta may be softer after freezing.
Frequently asked questions
Can I use a different bean?
Yes. Pinto beans, black beans, or cannellini beans all work. Use one 15-ounce (425 g) can, drained and rinsed.
What if the pasta absorbs the liquid before it is tender?
Add 1/4 cup (60 ml) of hot water, cover the pot, and simmer for another 2–3 minutes. Pasta brands and pot sizes absorb liquid at slightly different rates.
How can I make the chili mac spicier?
Add 1/4 teaspoon cayenne pepper with the chili powder, or cook one diced jalapeño with the onion.
Can I prepare this ahead?
Yes. Cook it as directed, cool it promptly, and refrigerate for up to 4 days. Add a splash of broth or water when reheating because the pasta continues to absorb sauce as it rests.
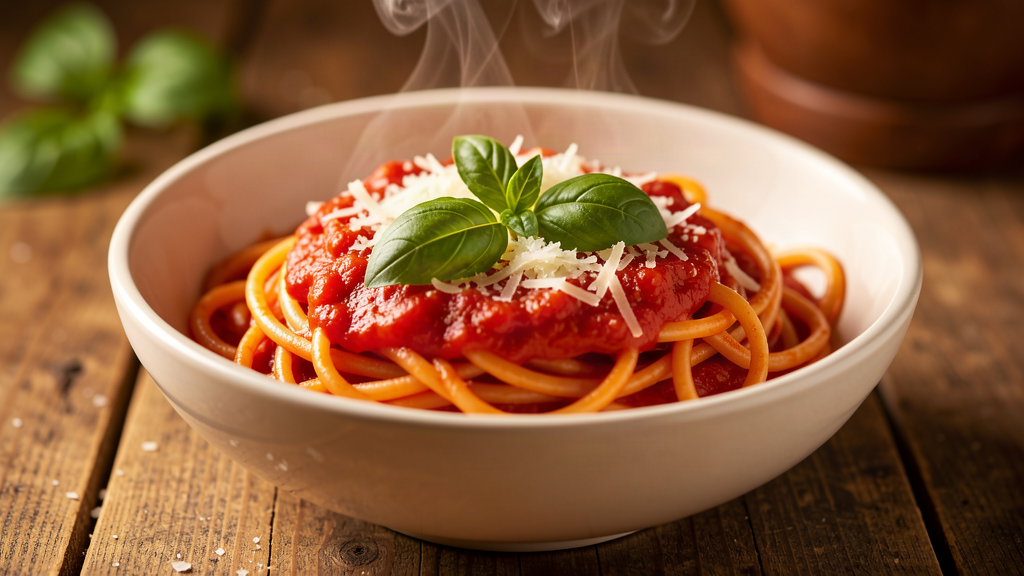
One-pot spaghetti with simple tomato sauce is the kind of dinner that works when you are tired, the cupboard is mostly empty, and you still want something genuinely good on the table. The pasta cooks right in the sauce, so every strand absorbs the tomato flavor as it softens — and you only have one pot to wash afterward.
This recipe uses pantry staples most home cooks already have: dried spaghetti, canned crushed tomatoes, onion, garlic, and a handful of dried herbs. It takes about 25 minutes from start to finish, serves four, and costs very little per serving. No specialty ingredients, no complicated techniques — just dinner.
Why you will like this recipe
One pot. The pasta and sauce cook together in the same pot — less washing up, less fuss.
25 minutes total. Five minutes of prep, twenty minutes of cooking. Faster than ordering takeout.
Pantry-friendly. Uses canned crushed tomatoes, dried spaghetti, and dried herbs. Fresh onion and garlic add flavor; the remaining core ingredients are pantry staples (Parmesan is optional).
Affordable. Simple, accessible ingredients keep the cost per serving low.
Dual measurements. Every ingredient lists both US customary and metric amounts, so you can cook with confidence wherever you are.
Practical substitutions included. Gluten-free pasta, whole peeled tomatoes instead of crushed, and vegetable or canola oil instead of olive oil — each swap is explained with notes on what changes.
1medium yellow onionabout 1 cup / 150 g, finely diced
3clovesgarlicminced
1can28 oz / 800 g crushed tomatoes
2cups480 ml water, plus more as needed
1tsp5 ml dried oregano
1tsp5 ml dried basil
1tsp5 ml salt, plus more to taste
1/2tsp2.5 ml black pepper
1/2tsp2.5 ml granulated sugar
1/4cup25 g grated Parmesan cheese, optional
Equipment
1 Large pot or deep skillet
1 Wooden spoon
1 Measuring cups and spoons
Method
In a large pot or deep skillet, heat the olive oil over medium heat for about 30 seconds.
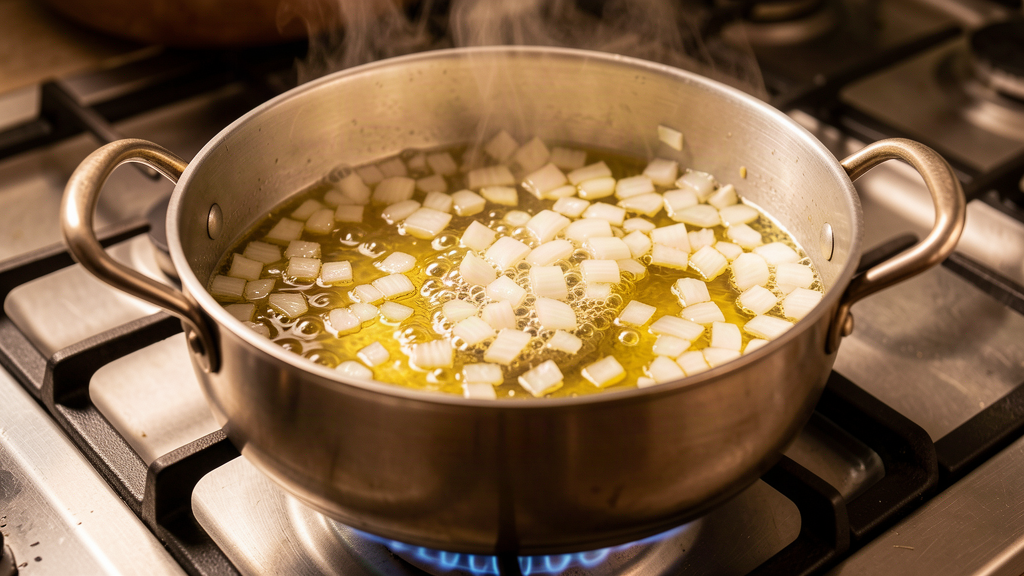
Add the diced onion and cook, stirring occasionally, until softened and translucent, about 5 minutes. Adjust the heat if the onion starts to brown too quickly.
Add the minced garlic and stir for 30 seconds, until fragrant. Do not let the garlic burn.
Pour in the crushed tomatoes and water. Add the oregano, dried basil, salt, pepper, and sugar, then stir well.
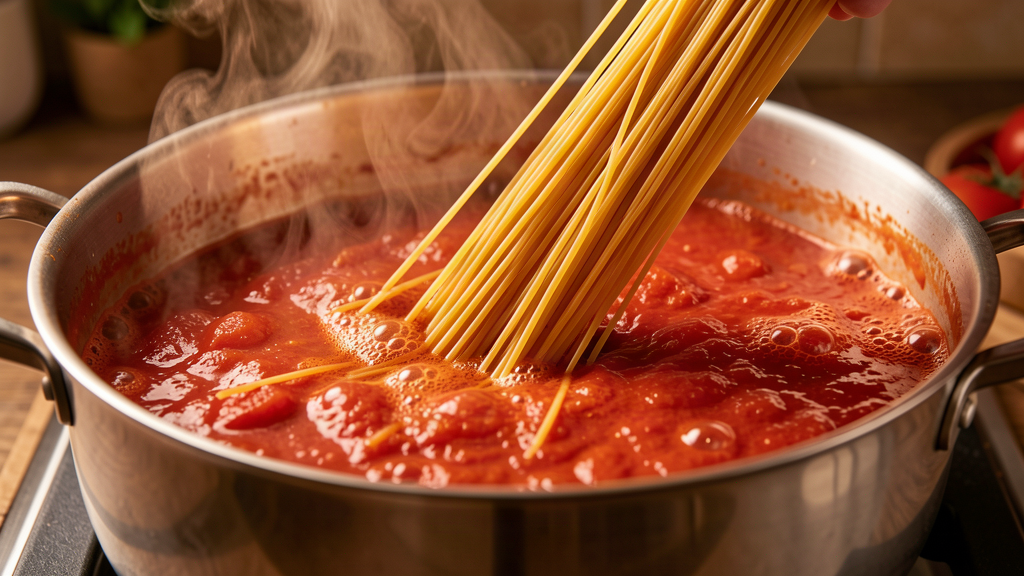
Break the spaghetti strands in half so they fit comfortably in the pot, then add them to the sauce.
Bring the mixture to a boil over medium-high heat, stirring frequently. Reduce the heat to medium-low, partially cover, and simmer for 12–15 minutes, stirring every 2–3 minutes, until the spaghetti is al dente and the sauce has thickened.
Taste and adjust the seasoning. If the sauce is too thick, add water 1/4 cup (60 ml) at a time. If it is too thin, simmer uncovered for another 2–3 minutes.
Divide among bowls and top with grated Parmesan if using. Serve immediately.
Notes
Use a large pot or 12-inch deep skillet and stir frequently so the pasta cooks evenly. Keep the spaghetti submerged; add another 1/2 cup (120 ml) water if needed. Store leftovers refrigerated in an airtight container for up to 4 days and reheat with a splash of water.
Illustrative AI-generated image. Step 5: adding spaghetti to the sauce.
Safe substitutions
Ingredient
Substitute
Notes
Spaghetti
Gluten-free spaghetti, linguine, or fettuccine
Check pasta package for cook time — GF pasta may need 1-2 minutes less
Crushed tomatoes
1 can (28 oz / 800 g) whole peeled tomatoes, blended smooth
Same quantity; texture will be slightly smoother
Dried basil
1/4 cup fresh basil, torn (add as garnish after cooking)
Fresh basil loses its flavor if cooked for 15+ minutes; add raw at the end
Parmesan
Nutritional yeast (2 tbsp / 15 g)
For a dairy-free option; flavor is different but pleasant
Olive oil
Vegetable oil or canola oil
Neutral flavor; works fine
Storage and reheating
Refrigerate: Store leftovers in an airtight container for up to 4 days. Reheat in a pot over low heat with a splash of water (1/4 cup / 60 ml) to loosen the sauce. Microwaving works too — cover loosely and heat in 60-second bursts, stirring between.
Freeze: Freeze in a sealed container for up to 2 months. Thaw overnight in the refrigerator before reheating. The pasta texture may be slightly softer after freezing.
Frequently asked questions
Can I use fresh tomatoes instead of canned?
Yes. Use about 2 lbs (900 g) of ripe fresh tomatoes, peeled and roughly chopped, instead of the 28 oz (800 g) can of crushed tomatoes. Simmer the sauce a few minutes longer to let the excess water evaporate. Fresh tomatoes will produce a lighter, brighter sauce than canned.
Do I have to break the spaghetti in half?
Breaking the spaghetti in half makes it easier to stir in a single pot, especially if your pot is wide rather than tall. If you prefer full-length spaghetti and have a deep pot, you can skip this step — but you may need to press the pasta down gently with tongs as it softens to submerge it in the sauce.
The sauce is too thick or too thin — what do I do?
If the sauce is too thick, add 1/4 cup (60 ml) of water at a time and stir. If it is too thin, simmer uncovered for another 2-3 minutes to let the excess liquid evaporate. The final consistency should coat the pasta strands without being watery.
Can I make this ahead of time?
Yes. This recipe reheats well and keeps for up to 4 days in the refrigerator. The pasta will absorb more sauce as it sits, so add a splash of water when reheating to bring it back to the right consistency.